Convert Bulk Custom list data to Modern Page using Power Automate

 |
| Custom List Entry |
 |
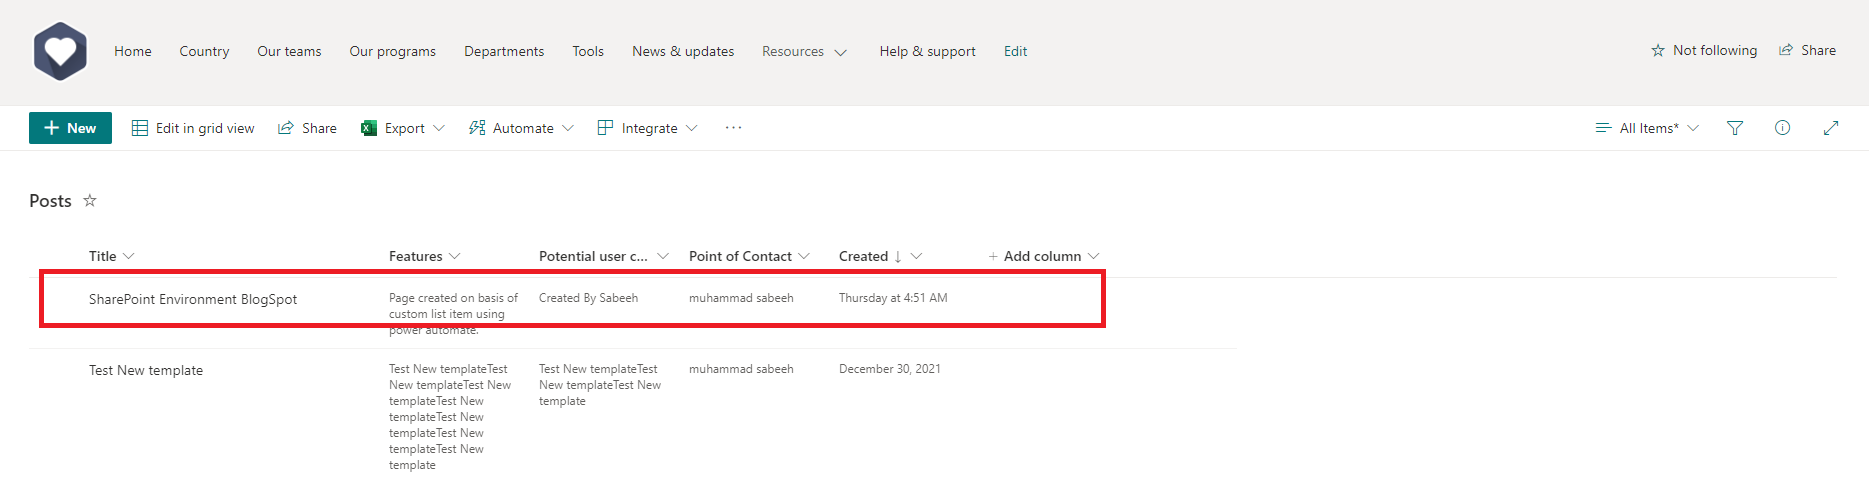
Power Automate Created Page |
1: Creating manual pages takes time, entry in custom list will save your time to create page.
2: Like if you migrated content from SharePoint on premises custom list to SharePoint online and you want to convert this list data to modern pages experience. So you are right article.
Perquisites:
Following are very basic steps as perquisites:
1: Create a list with desired columns so data can be
converted to Modern page.
2: Create Page template in modern view
Step 1: Create a Custom List
Columns depends on the data you want to map on Template I
created Features, Potential user cases and Point of contact. List Name: Posts
 |
| SharePoint list fields |
Step 2: Create a Template
Now create a new page in SitePages this page will be
utilized as Benchmark to map list data. PageTemplate.aspx I have created.
Enter Placeholders using text editor so we can search these
where list column should mapped. You can add as many you want I have added 3
only.
·
[**ListColumn 1**]
·
[**ListColumn 2**]
·
[**ListColumn 3**]
 |
Final Look of Template |
1.
Go to template page we created
(PageTemplate.aspx)
2.
Press F12 for Developer tool
3.
Go to Network tab
4.
Edit this template page and publish it
5.
In Network call there will be a action SavePage
like below
 |
| Developer tool to get Response |
Step 3: Click on view source:
Right click here and click show more then copy the complete
content.

Paste your content inside visual studio code and search for
listcolumn we will use below content in Power automate to create new page and
map content with listcolumn fields.
![]()
 |
Visual studio code replace Column placeholder |
Step 4: Create the Power Automate
- Power Automate Action On Item Creation
Create a Power automate on top of custom SharePoint list we
created at step 1 on item creation (Post List).
 |
| Power Automate Action |
- Copy Template.aspx as New Page:
/_api/web/getfilebyserverrelativeurl(‘/sites/SitePages/PageTemplate.aspx’)/copyto(‘/sites/SitePages/@{triggerBody()?[‘Title’]}.aspx’)
 |
| CopyTo Action to Create New Page |
- Checkout newly created Page:
After above action new page will be created in sitepages. But to
modify we have to check out this page after making changes we will check in
again. To achieve this we need Page ID there is action in power automate Get
file metadata like below but make sure you replaced forward slash with %2f
 |
| Check Out newly created Page |
Using get file metadata we have Page ID to check out the
page we have to run another send an http request like below using CheckOutPage
action:
 |
| Page Checkout action |
- Compose Action to Replace Spaces
Compose 1:
uriComponentToString(replace(uriComponent(triggerBody()?[‘Features’]),
‘%0A’, ‘</br>’))
Compose 2:
 |
Compose to remove spaces |
- Draft Page Action:
By creating 3rd HTTP request to SharePoint we can
save page as draft using below URI:
_api/sitepages/pages(@{body(‘Get_file_metadata’)?[‘ItemId’]})/savepageasdraft
In this part we will add response by copying from visual studio or from Response body browser developer tool. Paste this response in Body of http request action and search ListColumn and Page title. Replace page title with title from When an item created action.
 |
| Paste Response From Visual studio or Developer Tool |
 |
| Draft Page Call |
Now search ListColumn and replace multiple columns with
Compose outputs.
Features= outputs(‘Compose’)
Potential user cases = outputs(‘Compose_2’)

Following is final look after modifications:

- Publish Page
 |
| Publish Newly created page Action |
 |
| Summary Total Actions |
Thank for reading this article I hope this helps you. if you stuck somewhere please feel free to reach me in comments or through email: SabeeSharif@gmail.com